
This topic is designed to get you up and running as quickly as possible by describing the basic procedure for adding the WinDockManager™ component to a form in Microsoft® Visual Studio® 2005. You will see how to add the WinDockManager to a project and create a small set of docking panes at design-time. You will also see some of the features of the component that are available to users at run-time.
Create a new Windows Application project.
Select the UltraDockManager component in the toolbox and drag it onto the form. A dialog will appear giving you some tips to know while working with the component. Select OK.
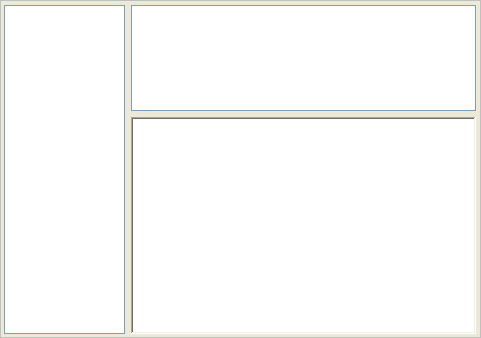
Select the All Windows Forms group of the Visual Studio toolbox. Select the TreeView control and draw a control on the form. Create the control so that it takes up the entire height of the form and about one-third of the form’s width.
Select a ListView control from the toolbox, and draw a it on the form. It should appear at the top of the form and take up the remaining two-thirds of the form’s width.
Select the RichTextBox control from the toolbox, and draw it on the form directly under the ListView control, extending to the bottom of the form.
Your form’s control area should appear similar to the following screen shot.
Right-click on the TreeView control and select "Dock Controls." The New DockArea dialog appears so you can create a docking pane for one or more controls and set up the initial positioning of the pane. The list at the top of the dialog shows the TreeView as the control selected for docking.
Verify that DockedLeft is selected from the "DockArea Location" drop-down list. In addition, set VerticalSplit as the selected value for the "Child Pane Style" drop-down list. Select OK, and you see the TreeView control replaced with a docking pane containing the TreeView control.
Click on the ListView control, then ctrl-click on the RichTextBox control to select both controls. Right-click on either control and choose "Dock Controls." The New DockArea dialog appears, with both controls listed. Make sure ListView1 appears at top of the list, use the arrow buttons to the right of the list to move it otherwise.
Change "DockArea Location" to DockedTop. Make sure "Child Pane Style" is set to HorizontalSplit, and select OK. You should see both controls appear in their own panes, but the panes will be grouped together in the order the controls originally appeared.
Build and run the application, and you should see something similar to the following.
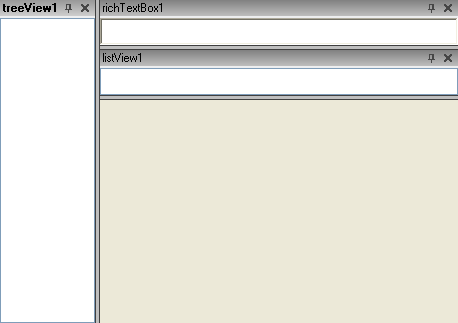
Try some of the following things to see how the WinDockManager behaves:
Click the pin icon in the title bar of the TreeView pane. The TreeView pane becomes pinned to the left docking area. When a pane is pinned, a tab appears in the docking area for that pane, and the pane collapses to the edge of the form when not in use. When you first pin a pane, it is immediately "flown out" from the edge for you to access, but you will notice that the ListView and RichTextBox control panes have changed width.
Click on the ListView control. The TreeView pane will collapse back into the left dock area, and you will see that the other two panes now occupy the entire top part of the form.
Pass your mouse pointer over the TreeView1 tab in the left docking area. The TreeView Pane will fly out and become visible, but it is not activated. Click the tab, and the pane is activated, as indicated by the color change of the pane’s title bar. Click the pin icon in the title bar again. The other two control panes will resize themselves to make room for the TreeView pane as it expands back into its former position. The tab and the visible dock area are no longer needed, so they disappear.
Click on the title bar of the ListView pane and drag it off of the form. You will see an outline appear indicating where the pane will end up when dropped. Release the mouse button and the pane will appear in its own floating window.
Click the X icon in the ListView pane’s title bar to close the pane. Then click the X icon to close the RichTextBox control’s pane. Closing a pane hides it and its controls from view. Now only the TreeView pane is visible on the form. Calling the ShowAll method off the UltraDockManager object will show all hidden panes. Note that they will reappear in their previous positions.
Drag the ListView pane back onto the form, but before you drop it, move your mouse pointer around to see the different docking areas available. The preview rectangle will show you where the pane will end up when dropped. Then move your mouse pointer into the title bar area of the RichTextBox pane. You should see the preview rectangle change to an irregular rectangle, or what is actually a rectangle with a tab at the bottom. Release the mouse button and the two panes will form a tab group.
Click the tabs at the bottom of the pane to switch between controls. Then click the tab for the ListView and drag it onto the title bar of the pane. The panes will rearrange into their original configuration.
You can try other combinations of mouse actions to see how panes can be rearranged. Try double-clicking a pane’s title bar, or right-clicking it. Create a tab group, then drag the tile bar of the tab group off of the form. Try pinning and unpinning a tab group. You will see that the DockManager element offers you a lot of flexibility in customizing the look of your application.