
The WinExplorerBar™ control supports the use of Windows Forms controls in place of the Items that normally make up a Group . When a Group’s Style property is set to ControlContainer, the Group becomes capable of hosting WinForms controls. When this style is chosen, the WinExplorerBar automatically creates a child ControlContainer control and positions it so that it fills the entire area of the Group. Any existing Items in the Group become inaccessible, as they are effectively hidden behind this container control.
The easiest way to set up controls in an WinExplorerBar Group is to create the Group at design-time and place the controls directly into it from the Visual Studio toolbox, just as you would place them on a Windows Form.
The following is a quick summary of the steps to follow to set up a control container Group at design-time. (The Add Groups and Items at Design Time topic contains a complete description of how to add Groups at design-time.)
Create a new Windows Application project in Visual Studio.
Select the Toolbox tab containing the UltraWinExplorerBar. Double-click the Toolbox item to add the control to your form.
Bring up the control’s context menu and choose "UltraExplorerBar Designer…" or select the element and click the "UltraExplorerBar Designer…" link in the bottom pane of the property sheet. The UltraExplorerBar Designer utility will appear. The "Groups and Items" tab should already be selected; if it is not, select it.
Click the "Add Group" button to add a new Group to the element. The properties for the newly added group will appear in the right side of the dialog.
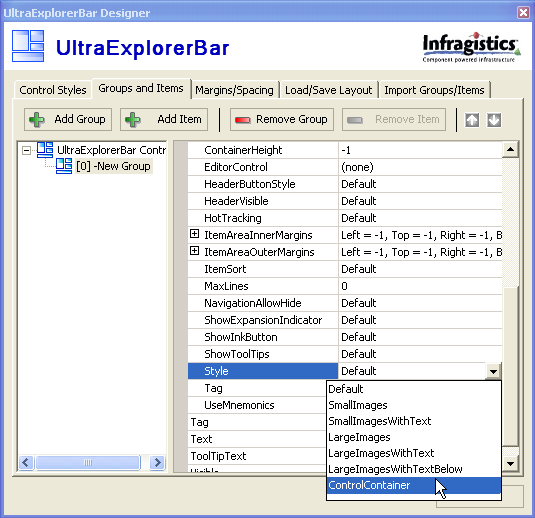
Double-click the Settings property in the property pane to expand it. Scroll down until the Style property is visible.
Click the Style property to select it and choose ControlContainer from the list of available options.
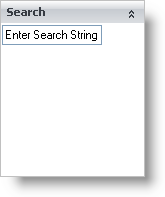
Click "Close" to close the dialog and apply the changes. You will see that a Group header and a control container area have been added to the element.
Click on the control container area (immediately under the Group header.) You will see a border indicating the extent of the control container. This border can be resized from the bottom edge to change the size of the control area.
Select a WinForms control such as a text box from the Toolbox. Draw the control inside of the control container area. When you are through, the control’s border will be highlighted, ready for you to change any of the control’s properties. You can also drag or resize the control within the confines of the control container.
Click the Group header. The Group will collapse and the control you placed will be hidden from view.
You can also add controls to a Group’s container control at run-time. To do this, you must obtain the container control for the Group, then re-parent the control to the container. The following code illustrates this process. It assumes that there is one Group in the element with it’s Style set to ContainerControl, and that there is a text box named TextBox1 already located on the form:
In Visual Basic:
Private Sub Create_a_Control_Container_Group_Load(ByVal sender As System.Object, _
  ByVal e As System.EventArgs) Handles MyBase.Load
	Me.TextBox1.Parent = Me.UltraExplorerBar1.Groups(0).Container
	' Re-position the control so that it appears
	' within the bounds of the container
	Me.TextBox1.Location = New Point(0, 0)
End Sub
In C#:
private void Create_a_Control_Container_Group_Load(object sender, EventArgs e)
{
	this.textBox1.Parent = this.ultraExplorerBar1.Groups[0].Container;
	// Re-position the control so that it appears
	// within the bounds of the container
	this.textBox1.Location = new Point(0, 0);
}
Using a similar process, you could create the control through code before adding it to the Group, bypassing the need to place the text box on the form.