
WinGrid™ offers you several features to help your end users edit records quickly and efficiently. One of these editing features is the WinGridRowEditTemplate™ control. WinGridRowEditTemplate is simply a dialog box that contains data bound textboxes linked to specific cells in one of WinGrid’s Bands . Which data bound cells that you display is completely up to you – WinGridRowEditTemplate includes a wizard to help you choose. The wizard displays when you set the RowEditTemplate property off a band to an instance of the WinGridRowEditTemplate control.
You will learn how to create a RowEditTemplate and associate it with a band in a data bound WinGrid control. You will also learn how to add labels, textboxes, and buttons to WinGridRowEditTemplate’s dialog box through the UltraGridRowEditTemplate Wizard.
Set up your form with the necessary controls .
Double click the UltraGrid control in the Microsoft® Visual Studio® toolbox. WinGrid is added to your form.
Set WinGrid’s Dock property to True.
Bind WinGrid to the customers table in the Northwind database. For more information, see Bind WinGrid to a Flat Data Source.
Double click the UltraGridRowEditTemplate control in the Visual Studio toolbox. A blank RowEditTemplate is added to your form and the UltraGridRowEditTemplate Wizard appears.
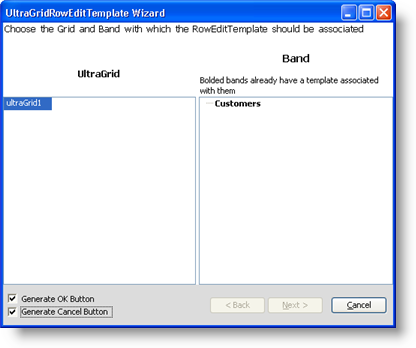
In the Wizard, ensure that ultraGrid1 is selected in the left column and select the Customers band in the right column.
Click Next. At this point, the Customers band is using the RowEditTemplate and the UltraGridRowEditTemplate Wizard appears.
Set up the RowEditTemplate with a few fields and buttons .
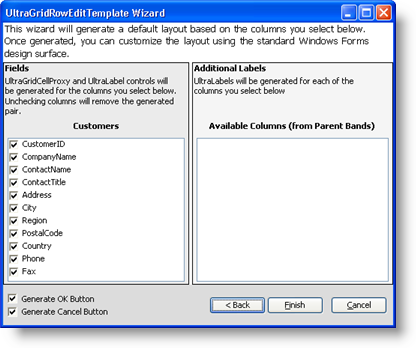
The UltraGridRowEditTemplate Wizard is a very intuitive interface that quickly allows you to add data bound, editable fields to a dialog box in order to edit WinGrid. By selecting or clearing available columns from the left list, you will have created a completely functional editing dialog box that your end users can use to edit your data.
Clear the check boxes from all columns except CompanyName, Address, City, Region, PostalCode, and Country from the left list. WinGridRowEditTemplate will generate a WinGridCellProxy control for each item in the Generated Proxies list. For more information, see Add a WinGridCellProxy to a WinGridRowEditTemplate.
Click Finish to have WinGridRowEditTemplate generate the cell proxies, matching labels, and an OK and Cancel button. If you’d like to create Ok and Cancel buttons yourself, be sure to clear the check boxes next to Generate OK Button and Generate Cancel Button, respectively. For more information, see Adding Buttons to WinGridRowEditTemplate’s Dialog Box.
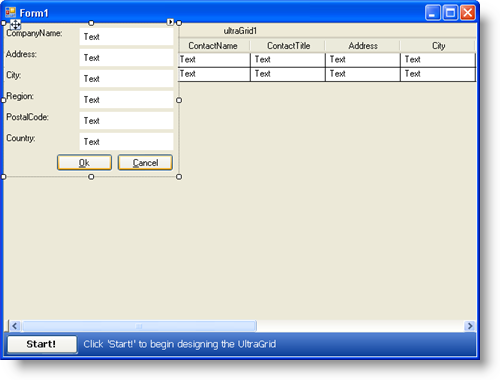
After clicking Finish, your form should look similar to the following screen shot.
Run the application .
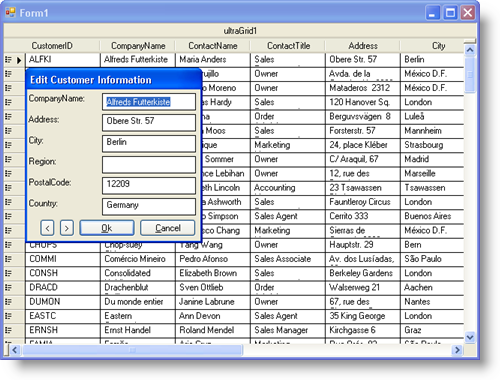
When you run the application, you will notice that WinGridRowEditTemplate’s dialog box is hidden. Click the row edit template button to the left of the first row. The RowEditTemplate appears. You can modify the row’s values as if you were modifying the row itself because the WinGridCellProxy controls are bound to the values in the row. You can either click Ok to commit any changes to the data source, or you can click Cancel to abandon your changes.
If you try to select another row to edit in WinGrid while WinGridRowEditTemplate’s dialog box is open, you will not be able to because WinGridRowEditTemplate is set to be a modal dialog box by default. You can easily change this setting by setting the DisplayMode property to Modeless. Alternatively, you can add additional buttons to the dialog box to help your end user navigate through the rows. For more information on adding navigation buttons to the dialog box, see Adding Buttons to WinGridRowEditTemplate’s Dialog Box.