
This topic demonstrates how to style the WinLiveTileView™ control using the designer, in code-behind and AppStylist .
The following topic is required as a prerequisite to understanding this topic.
This topic contains the following sections:
The WinLiveTileView control provides different ways to style the appearances of the tiles and other visual elements.
The WinLiveTileView also supports AppStylist that you can use to create a style library file with desired styles for the elements and save it as a theme file for your WinLiveTileView control.
For using the WinLiveTileView designer, please refer to the Required background section before you continue, as this section assumes that you already familiar using the designer interface to create a tile.
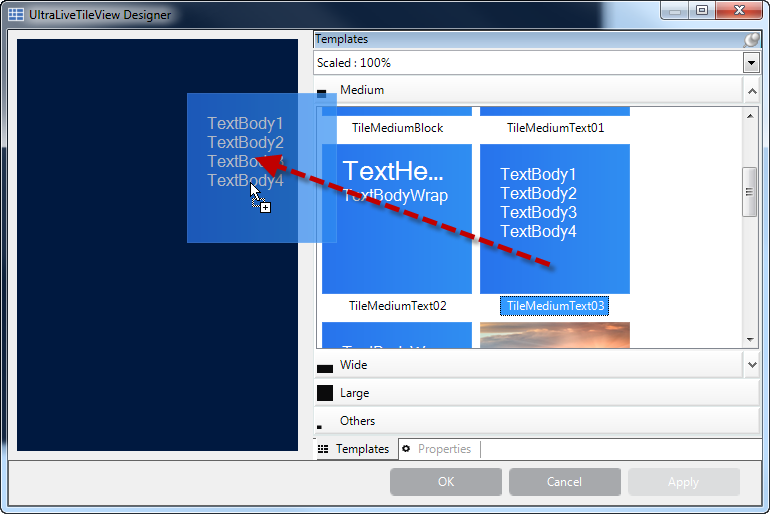
Open the WinLiveTileView ’s designer and add a medium tile to the control layout.
Select the tile, click the Properties tab, and then expand the Appearance property in the property grid.
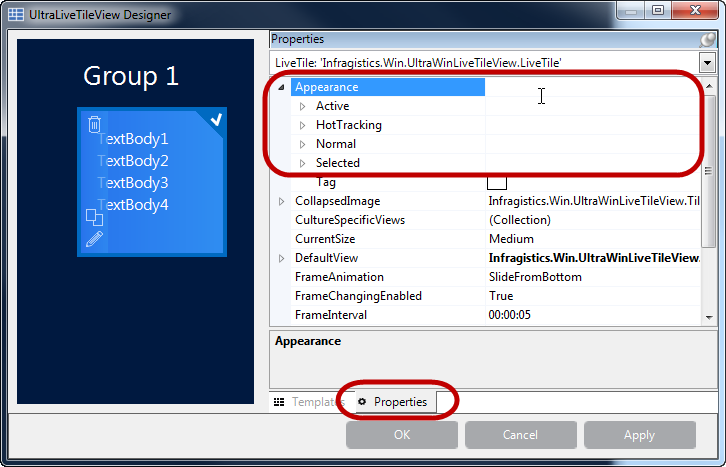
Each tile exposes the four Appearance properties outlined above:
The following screenshot illustrates one of the appearance settings (HotTracking) as the others are similar.
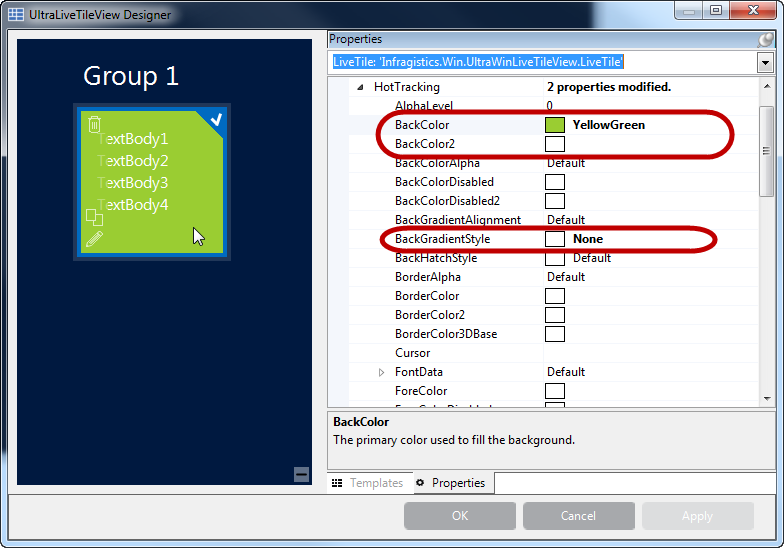
The following code example demonstrates styling the tile’s background in code-behind by obtaining a reference of the group and the tile within that group.
In C#:
LiveTile liveTile = (LiveTile)ultraLiveTileView1.Groups[“Group 1”].Tiles[“mediumTile1”];
liveTile.Appearance.HotTracking.BackColor = Color.YellowGreen;
liveTile.Appearance.HotTracking.BackGradientStyle = GradientStyle.None;
In Visual Basic:
Dim liveTile As LiveTile = DirectCast(ultraLiveTileView1.Groups(“Group 1”).Tiles(“mediumTile1”), LiveTile)
liveTile.Appearance.HotTracking.BackColor = Color.YellowGreen
liveTile.Appearance.HotTracking.BackGradientStyle = GradientStyle.NoneThe WinLiveTileView groups expose a slightly different set of properties, including tile collections and capability to set style for all tiles within that group.
The following code example demonstrates styling the group appearance (Border and BackColor) in code-behind by obtaining a reference of the group with key.
In C#:
TileGroup tileGroup = (TileGroup) ultraLiveTileView1.Groups["Group 1"];
tileGroup.Appearance.Normal.BorderColor = Color.Red;
tileGroup.Appearance.Normal.BackGradientStyle = GradientStyle.None;
tileGroup.Appearance.Normal.BackColor = Color.FromArgb(128, 128, 255);
In Visual Basic:
Dim tileGroup As TileGroup = DirectCast(ultraLiveTileView1.Groups("Group 1"), TileGroup)
tileGroup.Appearance.Normal.BorderColor = Color.Red
tileGroup.Appearance.Normal.BackGradientStyle = GradientStyle.None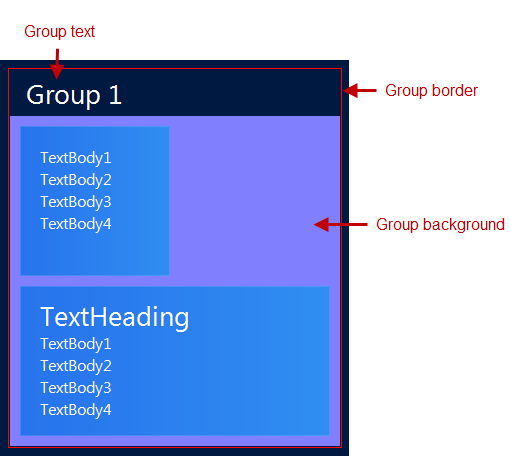
tileGroup.Appearance.Normal.BackColor = Color.FromArgb(128, 128, 255)The following code example demonstrates styling the group text appearance (Border and BackColor) in code-behind by obtaining a reference of the group with key.
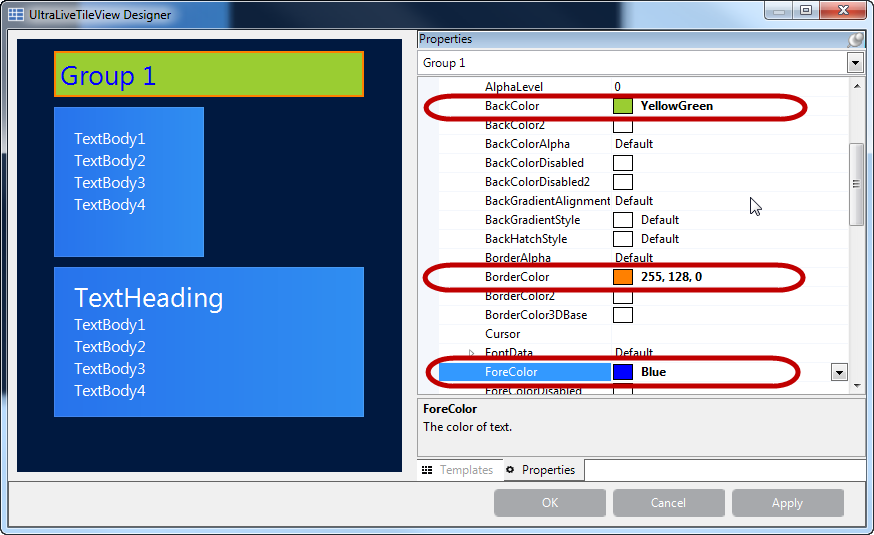
The following code example demonstrates styling the group text appearance (Border, ForeColor and BackColor) in code-behind by obtaining a reference of the group with key.
In C#:
TileGroup tileGroup = ultraLiveTileView1.Groups["Group 1"];
tileGroup.TextAreaAppearance.Normal.BackColor = Color.YellowGreen;
tileGroup.TextAreaAppearance.Normal.BorderColor = Color.Orange;
tileGroup.TextAreaAppearance.Normal.ForeColor = Color.Blue;
In Visual Basic:
Dim tileGroup As TileGroup = ultraLiveTileView1.Groups("Group 1")
tileGroup.TextAreaAppearance.Normal.BackColor = Color.YellowGreen
tileGroup.TextAreaAppearance.Normal.BorderColor = Color.Orange
tileGroup.TextAreaAppearance.Normal.ForeColor = Color.BlueThe group contains a collection of tiles; consequently, changes made to setting the group’s tile appearance properties, apply to all tiles within that group.
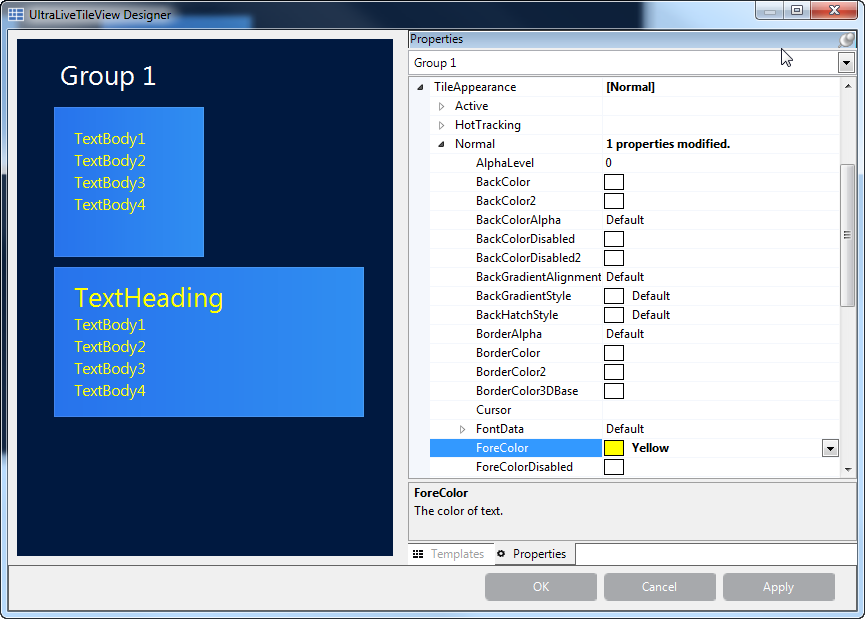
The following code example demonstrates styling the group tile appearance (ForeColor) in code-behind by obtaining a reference of the group with key. This setting applies to all tiles in the group.
In C#:
TileGroup tileGroup = ultraLiveTileView1.Groups["Group 1"];
tileGroup.TileAppearance.Normal.ForeColor = Color.Yellow;
In Visual Basic:
Dim tileGroup As TileGroup = ultraLiveTileView1.Groups("Group 1")
tileGroup.TileAppearance.Normal.ForeColor = Color.YellowThe WinLiveTileView component supports AppStylist , providing you with several styling option, such as using one of the pre-defined style library files; or one of the existing templates and customizing it with a different look; or even creating your own library file using the AppStylist .
For more information, please refer to the Setting Up Your Application for Styling topic on how to create style library files with AppStylist for LiveTileView or any other Ultimate UI for Windows Forms controls in general.
The following topics provide additional information related to this topic.