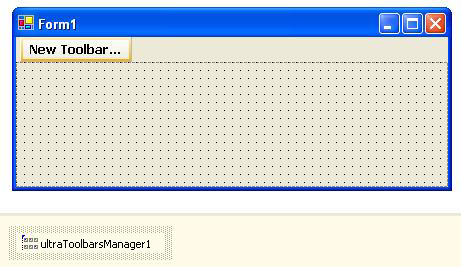

The In Place Designer allows you to interact with the WinToolbarsManager™ control in the Visual Studio IDE itself. This option, which is enabled by default, can be disabled by right clicking on the UltraToolbarsManager and unchecking In Place Designer. When the UltraToolbarsManager component is selected in IDE, a New Toolbar button is displayed in the top dock area.
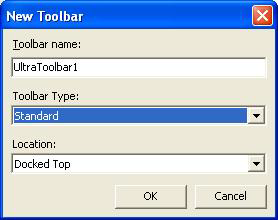
When the New Toolbar button is clicked, a dialog is displayed that allows you to create a new UltraToolbar or UltraTaskPaneToolbar. The Toolbar name assigned is used as the key of the new toolbar. The Toolbar Type indicates whether to create a standard toolbar or a TaskPane style toolbar. The Location is used to indicate the initial docked location of the new toolbar (e.g. Left, Right, Top, Bottom or Floating). For information on the toolbar types, see Working with Toolbar Types.
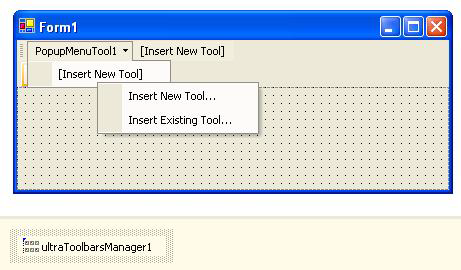
Every toolbar and menu tool whose Tools collection may be modified displays a special placeholder tool - [Insert New Tool] - after the existing tools. Clicking on this tool with the left mouse button will display a context menu which provides options for inserting tools into the tools collection. Clicking Insert New Tool… displays the New Tool dialog which is used to create a new tool which will be added both to the UltraToolbarsManager’s Tools collection as well as to the Tools collection of the object whose [Insert New Tool] placeholder was clicked. Clicking Insert Existing Tool… displays the Existing Tool dialog which is used to create an instance of a tool already added to the UltraToolbarsManager’s Tools collection.
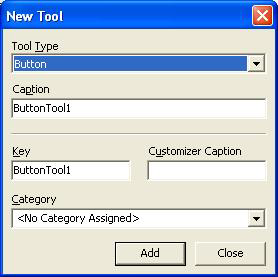
The New Tool dialog is used to create a new tool that should be added to the Tools collection of the UltraToolbarsManager. The dialog allows you to specify the type of the tool to create (e.g. ButtonTool, ComboBoxTool, etc.), as well as some basic properties such as its Caption (the text displayed to the end user), Key (the string value used to uniquely identify the tool within the UltraToolbarsManager), Customizer Caption (the string displayed for the tool in the customize dialog, and the Category (the string category name used to group the tools within the customize dialog’s Tool tab.
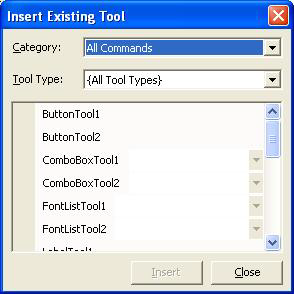
The Insert Existing Tool dialog allows you to insert an instance of a previously created tool (i.e. one that has already been added to the Tools collection of the UltraToolbarsManager) and provides comboboxes to help filter the list allowing you to more easily locate the tool that should be inserted.
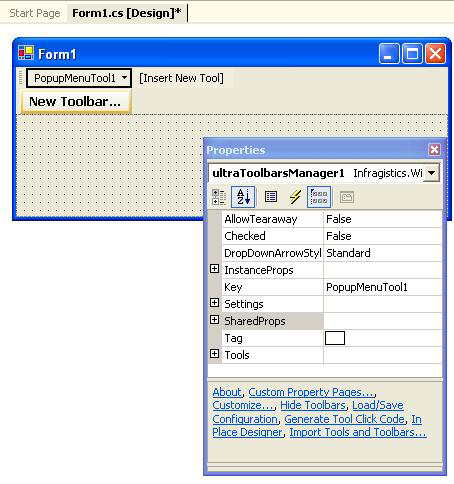
When using the In Place designer, it is possible to select a tool or toolbar by left clicking on the item. The selected object is rendered using a thick black outline. In the image below, the PopupMenuTool on the toolbar in the top dock area has been selected. When a tool or toolbar is selected, an additional property tab in the IDE’s Properties Window can be used to change that instance’s properties. To access the additional tab, you need to click on the  icon in the Properties window.
When a tool is selected in the designer, right clicking on the tool will display a custom context menu. This menu is similar to that displayed by the customize dialog while in customize mode at runtime but includes some additional options.
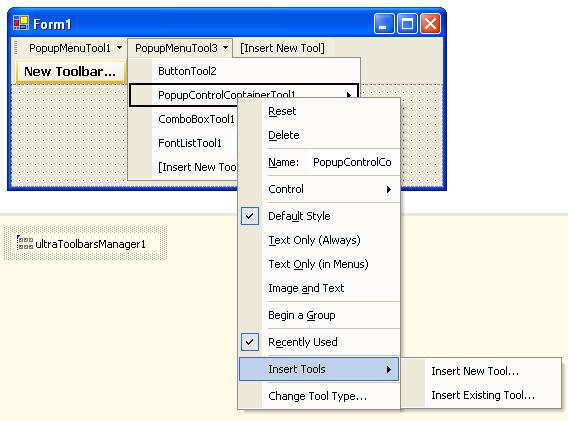
The following is a breakdown of the options available on the tool context menu:
Reset — Invokes the ResetState method on the tool which is used to reset any customizations.
Delete — Removes this tool instance from the containing Tools collection.
Name — Changes the Caption property of the tool to the text entered into the text box.
Control — Used to choose which Control is associated with the tool. Note, this is only available for tools that utilize a control such as the ControlContainerTool , PopupControlContainerTool and TaskPaneTool .
Style Options — This is a set of 4 options used to determine the DisplayStyle of the tool. Note, this option is only available for some tool types (e.g. ButtonTool , etc.)
Begin a Group — This option controls the IsFirstInGroup property of the tool which is used to insert a separator before the tool.
Recently Used — Changes the RecentlyUsed property which is used to determine whether the tool should be displayed in the initial drop-down of the containing popup menu. Note, this value is affected by other properties such as AlwaysShowMenusExpanded .
Insert Tools — Displays a submenu which allows tools to be inserted before this insert tool instance.
Change Tool Type… — Displays a separate dialog that can be used to convert this and all instances of the same tool within the UltraToolbarsManager to a different tool type (e.g. to convert a ButtonTool to a StateButtonTool ).