
This topic provides procedural instructions on how to add an image to a worksheet using the Infragistics Excel Engine.
The following topics are prerequisites to understanding this topic:
This topic contains the following sections:
This procedure demonstrates how to add an image to a worksheet. Images are represented by the WorksheetImage class and are added in the Shapes collection of the worksheet.
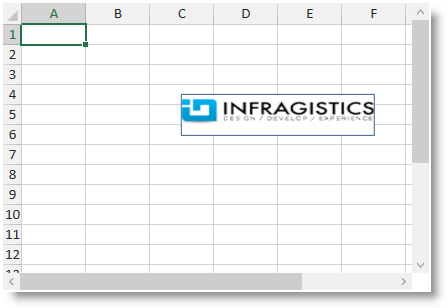
The following screenshot is a preview of the final result including all optional steps:
To complete the procedure, you need the following:
An initialized workbook with at least one worksheet.
Following is a conceptual overview of the process:
Create an Image from a Stream
Create a WorksheetImage from an Image
Configure WorksheetImage’s position in twips (alternative)
Configure WorksheetImage’s cell position (alternative)
Configure WorksheetImage’s positions within the cells (alternative and optional)
Configure WorksheetImage’s properties (optional)
Add the WorksheetImage to the Shapes collection of the worksheet.
The following steps demonstrate how to add an image to a worksheet.
Create an Image object. You can do this using the static method of the Image class by providing a stream or filename.
In C#:
string imgResource = "Assembly.Folder.File.png";
using (Stream stream = this.GetType().Assembly.GetManifestResourceStream(imgResource))
{
    System.Drawing.Image img = System.Drawing.Image.FromStream(stream);
}
In Visual Basic:
Dim imgResource As String = "Assembly.Folder.File.png"
Using stream As Stream = Me.[GetType]().Assembly.GetManifestResourceStream(imgResource)
    Dim img As System.Drawing.Image = System.Drawing.Image.FromStream(stream)
End Using
Create a WorksheetImage object by providing the Image instance from the previous step.
In C#:
WorksheetImage wsi = new WorksheetImage(img);In Visual Basic:
Dim wsi As WorksheetImage = new WorksheetImage(img)
You need to specify the bounds of the image in twips using the SetBoundsInTwips method.
In C#:
Graphics gfx = Graphics.FromImage(img);
wsi.SetBoundsInTwips(
this.xamSpreadsheet1.Workbook.Worksheets[0],
    new Rect(
        PixelsToTwips(50, gfx), // left = 50
        PixelsToTwips(50, gfx), // top = 50
        PixelsToTwips(img.Width, gfx),
        PixelsToTwips(img.Height, gfx))
);
In Visual Basic:
Dim gfx As Graphics = Graphics.FromImage(img)
' left = 50
' top = 50
wsi.SetBoundsInTwips( _
    xamSpreadsheet1.Workbook.Worksheets(0), _
        New Rect(PixelsToTwips(50, gfx), _
            PixelsToTwips(50, gfx), _
            PixelsToTwips(img.Width, gfx), _
            PixelsToTwips(img.Height, gfx)))
In C#:
public double PixelsToTwips(int pixels, Graphics gfx)
{
    // convert pixels to points
    double p = pixels * 72 / gfx.DpiX;
    // convert points to twips
    return p * 20;
}
In Visual Basic:
Public Function PixelsToTwips(pixels As Integer, gfx As Graphics) As Double
    ' convert pixels to points
    Dim p As Double = pixels * 72 / gfx.DpiX
    ' convert points to twips
    Return p * 20
End FunctionYou need to specify the cells which will occupy the image using the TopLeftCornerCell and BottomRightCornerCell properties.
In C#:
wsi.TopLeftCornerCell = this.xamSpreadsheet1.Workbook.Worksheets[0].Rows[3].Cells[2];
wsi.BottomRightCornerCell = this.xamSpreadsheet1.Workbook.Worksheets[0].Rows[5].Cells[5];
In Visual Basic:
wsi.TopLeftCornerCell = xamSpreadsheet1.Workbook.Worksheets(0).Rows(3).Cells(2)
wsi.BottomRightCornerCell = xamSpreadsheet1.Workbook.Worksheets(0).Rows(5).Cells(5)Also you can specify the exact location of the top left and bottom right corner using the TopLeftCornerPosition and BottomRightCornerPosition properties. These positions are specified in percentages, so if you want to position any of the corners in the middle of a cell use a Point(50, 50) for both position properties.
Following is the code that implements this example.
In C#:
wsi.TopLeftCornerPosition = new System.Windows.Point(50, 50);
wsi.BottomRightCornerPosition = new System.Windows.Point(50, 50);
In Visual Basic:
wsi.TopLeftCornerPosition = new System.Windows.Point(50, 50)
wsi.BottomRightCornerPosition = new System.Windows.Point(50, 50)You can set a background color for your image, so the worksheet’s gridlines are not visible if your image has transparent background.
You can also set any outline (or remove the default one) to the WorksheetImage instance.
The following code snippet shows how to add a white background and remove the default outline on your WorksheetImage.
In C#:
wsi.Fill = new ShapeFillSolid(Colors.White);
wsi.Outline = null;
In Visual Basic:
wsi.Fill = new ShapeFillSolid(Colors.White)
wsi.Outline = NothingAdd the WorksheetImage instance to the Shapes collection.
Following is the code that implements this example.
In C#:
this.xamSpreadsheet1.Workbook.Worksheets[0].Shapes.Add(wsi);In Visual Basic:
xamSpreadsheet1.Workbook.Worksheets(0).Shapes.Add(wsi)The following topics provide additional information related to this topic.